
Written on February 5, 2019
Have you heard about image optimisation, but you don’t know how to do it or what image optimisation does for your website? If so, you are in for a treat! Below, I will take you through everything you need to know to optimise the images on your website, boosting performance instantly!
Image optimisation is the process of reducing the file size of your images with minimal visual quality loss.
While there are many tools to optimise images (see below), each image and format is different and, therefore, there is no one-size-fits-all approach to image optimisation.
For many websites, images are used to enhance the user experience, and enable website visitors to quickly understand the context of a page. However, images on the web can also, if not properly optimised, significantly slow the loading of a page.
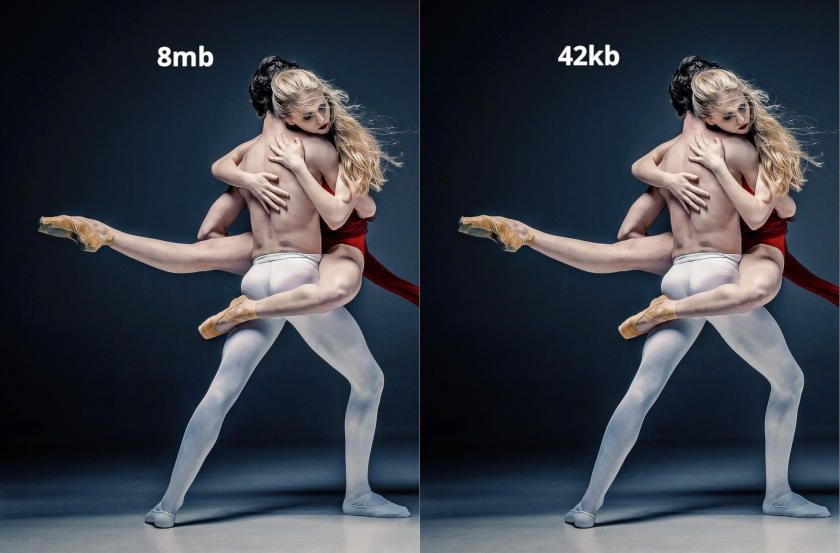
Comparison of image quality after resize and compression
First impressions count: Evidence suggests that, on average, it takes internet users only 3 seconds to decide whether to leave a page. If your pages take over 3 seconds to load, expect a significant loss of traffic!
Raster (or bitmap) images are composed of pixels. When a photograph is taken, these pixel-based images are likely very large in both file size and dimensions.
There are a number of techniques used by image optimisation software to reduce the file size of the image such as limiting the number of colours or removing EXIF data (image data, such as camera model, location of the shot and whether the flash fired etc.).
Often a raster image can be reduced in file size by 60-90% without noticeable visual quality loss.
While plugins can help you to automate processes on your website, we don’t recommend optimising images using plugins. These image optimisation plugins often require, for good compression, that you upgrade to the pro version of the plugin and they don’t offer much user control.
Here are some of the most popular image optimisation plugins for WordPress:
There are a number of tools available for the desktop. These are some of the most popular:
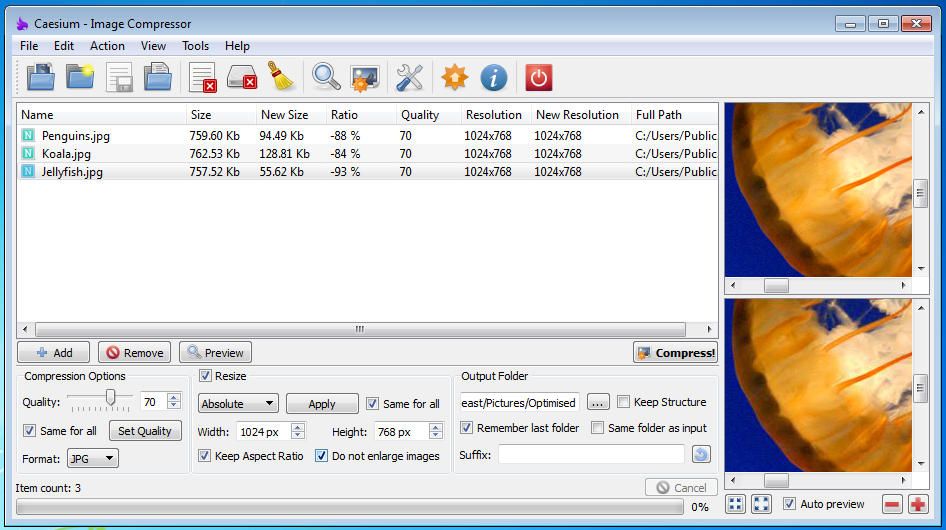
Caesium Image Optimistation/Compression and Resize Tool
When exporting images, both of these tools (below) offer the option to reduce image quality without damaging the original file. If you frequently edit images for the web, exporting in this way is a good habit to have.
How to optimise images with GIMP
Not a bad option if you are in a fix and need to optimise an image quickly, but online image optimisation is not useful as part of an efficient workflow.
Unlike raster images, vector graphics are composed of mathematical co-ordinates. These graphics can be resized without distortion or pixelation.
Optimisation of vector graphics is very different to that of raster/bitmap images as the largest reduction is often achieved through simplification through reduction of nodes.
Also, vector graphics software often include, in the file, additional code relating to the software itself (effects, layer data etc.).

How to optimise vector graphics in Inkscape
To optimise a vector graphic with Inkscape, use the “edit paths by nodes” tool to select a shape and press ctrl+l ( cmd+l on the Mac) to reduce the number of nodes.
Once the nodes have been reduced, click “File” > “Save as” and select “Optimised SVG”. When closing Inkscape, do not save the document or you will save over your optimised version.
The benefits of image compression and optimisation are significant. For beginners, new to optimising JPGs and PNGs images, I would strongly recommend desktop tools such as Caesium (Windows) and ImageOptim (Mac) which can optimise your images in batches. For those with a more technical background, you may find that the command line (ImageMagick — Win, Mac, Linux) provides more granular control.
For vector graphic (SVG) optimisation, Inkscape or illustrator can export your images without the extra “fluff” and you can take this further using SVGOMG. Again, for the advanced user, you may choose to do this manually with a text editor.
Did you find this post on image optimisation useful. If you did, feel free to bookmark it and share it with someone who you think may benefit.